Organizing Your Store with the Category Organizer
Categorizing your products assigns each one its correct place in Shopify’s Standard Product Taxonomy. The Category Organizer takes the next step: it turns those categories into a shopper-facing store structure—smart collections and a navigation menu—so customers can browse your catalog by category.
Where automatic categorization runs quietly in the background one product at a time, the Organizer is a deliberate, reviewable action you take when you want to shape your storefront. You configure a run, Categorify proposes a set of collections, you review and edit that proposal for free, and only then does it create anything in your store.
What the Category Organizer Does
An Organize Run produces two things:
Smart collections - Shopify collections defined by rules based on product category, not by hand-picked product lists. Because they’re rule-based, any product you categorize later automatically flows into the matching collection. Your collections stay current on their own—no manual re-sorting.
A navigation menu (optional) - A flat “Shop by Category” style menu with one link per collection, so shoppers can browse straight from your storefront navigation.
This is the payoff of categorizing first, then organizing: once the collections exist, they keep filling themselves as your catalog grows.
Categorify owns the collections it creates. If you run the Organizer again later, it reconciles the collections it already made instead of piling up duplicates.
Before You Start
Categorize your products first. The Organizer only groups categories that your products actually use—it reads the categories already sitting on your products. If few products are categorized, the proposal will be thin. If you haven’t categorized yet, start with Categorizing Products.
Generating a proposal costs 50 credits. Reviewing, editing, applying the proposal, and building the menu are all free. See Credits and Limits below and Understanding Credits for how credits work.
You need an active plan. The Organizer isn’t available during an expired trial or on a canceled plan.
Opening the Organizer
- Open Apps → Categorify in your Shopify admin to reach the dashboard
- Click Organizer near the top of the page (or press the O key)
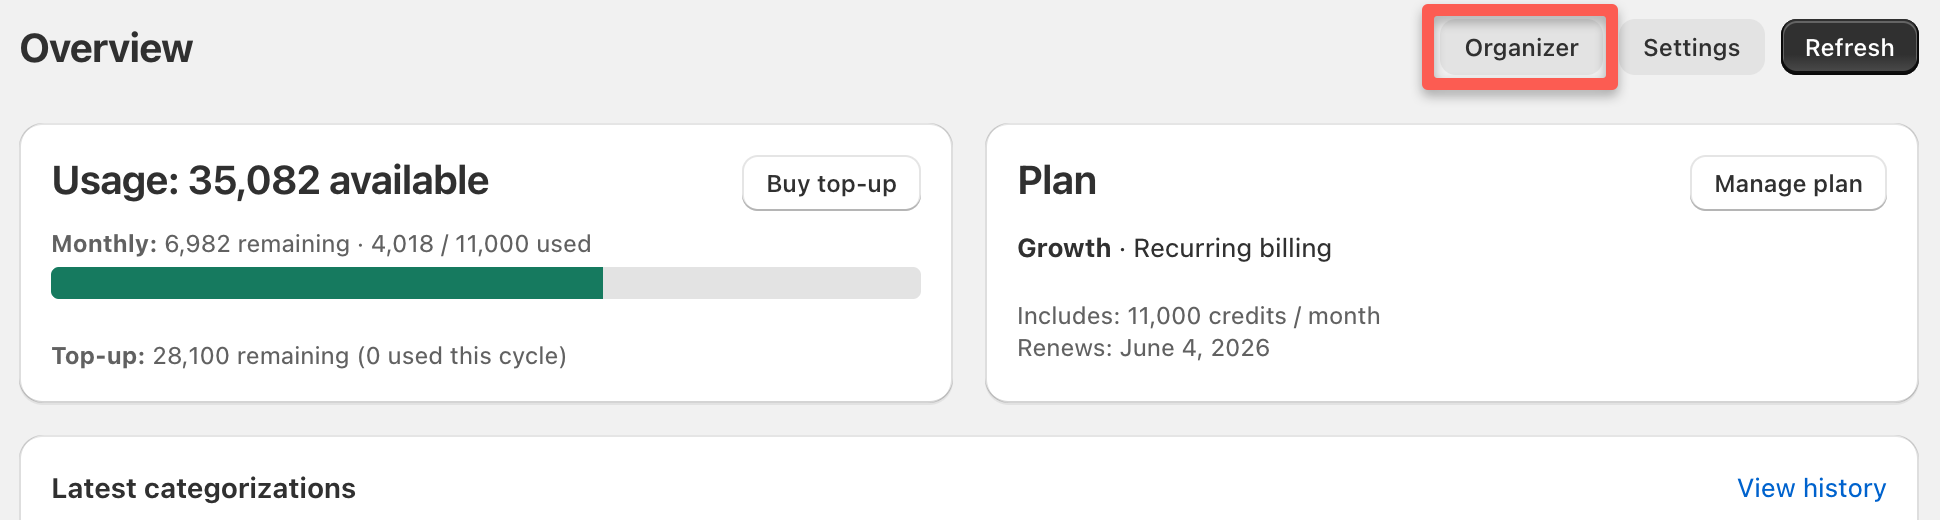
You’ll land on the Category Organizer welcome screen, where you configure your run.
Step 1: Configure Your Run
The welcome screen lets you shape the proposal before you spend any credits.
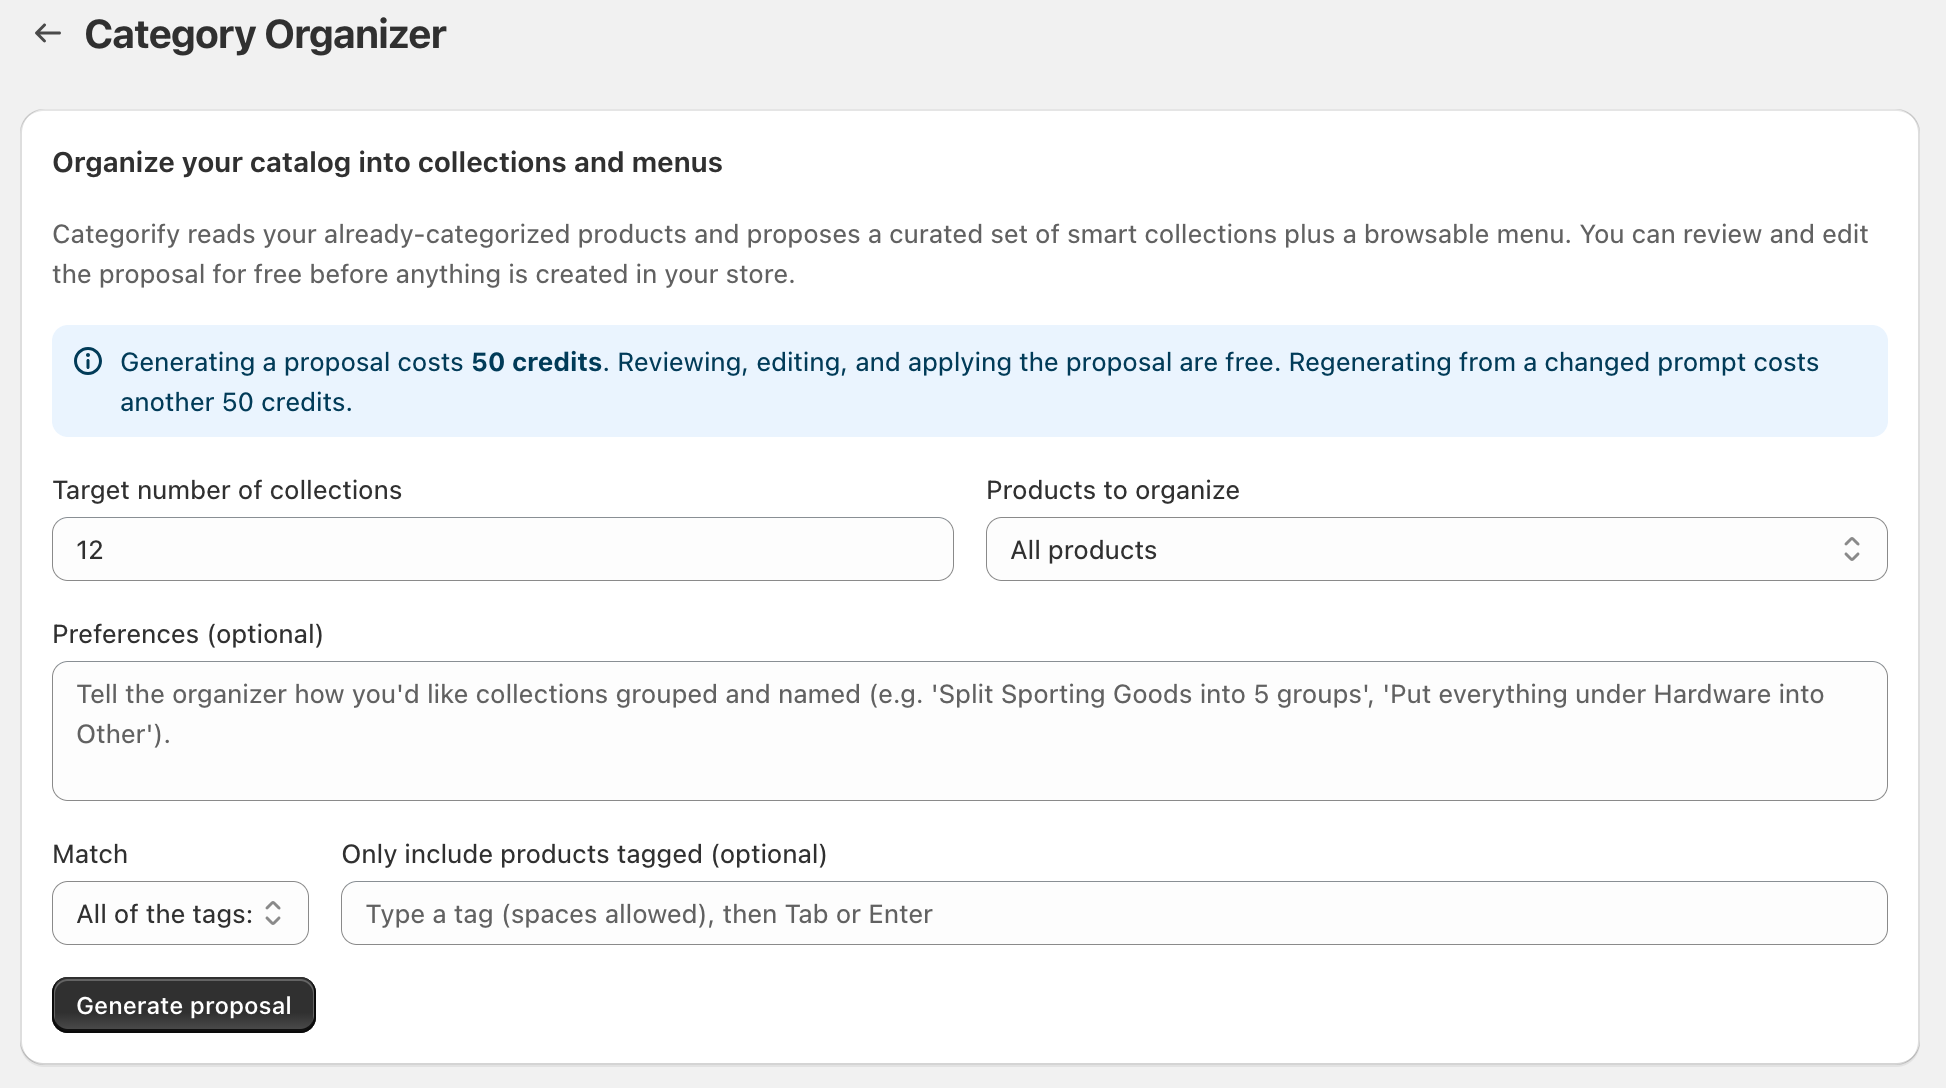
Target number of collections - Roughly how many collections you want. Defaults to 12; you can set anything from 1 to 100. This is a guide, not a hard rule—Categorify uses it to decide how finely to group your categories.
Products to organize - Scope the run to your whole catalog (All products, the default) or to a single top-level category area—a vertical—such as Apparel & Accessories, Electronics, or Home & Garden. Use this when you want to organize one part of your store at a time.
Preferences (optional) - Plain-language guidance on how you’d like collections grouped and named, for example “Split Sporting Goods into 5 groups” or “Put everything under Hardware into Other.” Categorify’s AI uses this to choose which groups to create and what to call them. Up to 2,000 characters.
Only include products tagged (optional) - Narrow the run to products carrying specific tags. Add up to 25 tags, and use the Match dropdown to require all of the tags (default) or any of the tags. Leave this empty to include every product in scope.
When you’re ready, click Generate proposal. This is the point where the 50 credits are charged—but only once a proposal is actually produced (see the next step).
Step 2: Scanning Your Catalog
After you click Generate proposal, Categorify works through several phases, shown as a stepper at the top of the page—Scan → Design → Create → Publish → Menu—with a live progress label such as “Reading your catalog” or “Designing collections with AI.”
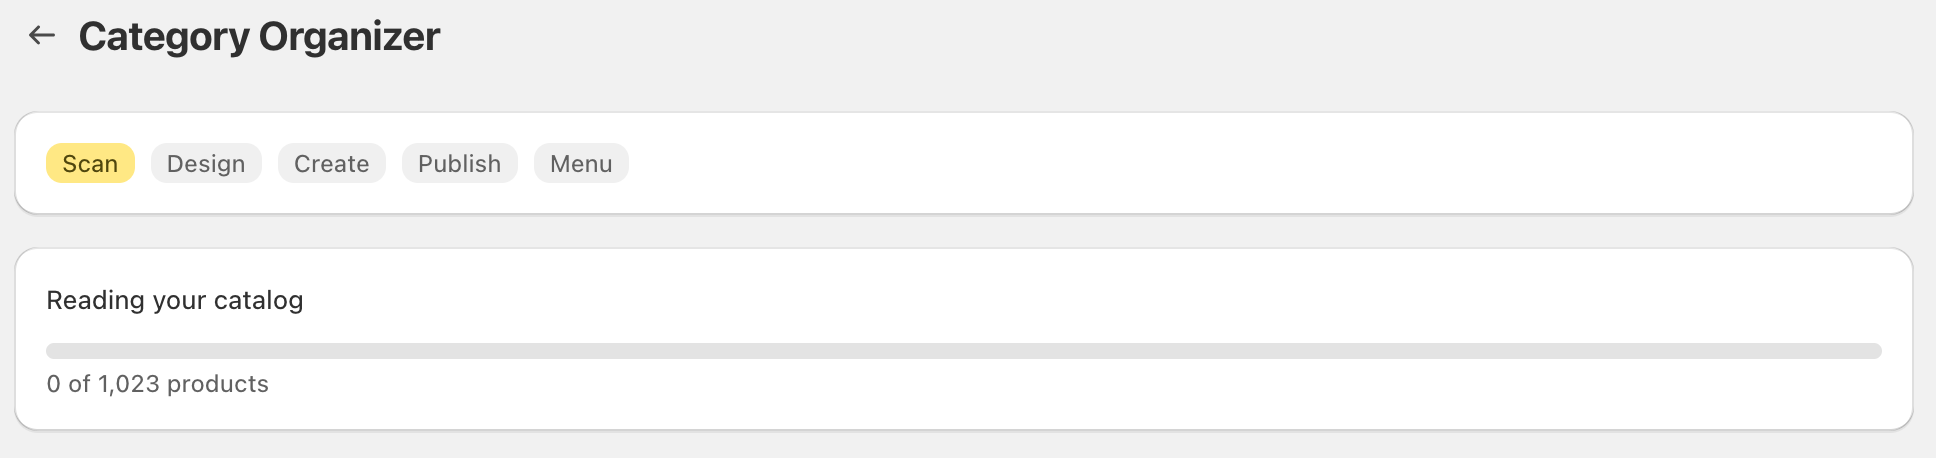
During this step, Categorify:
- Scans your catalog to find the distinct taxonomy categories your products actually use, each with a product count
- Designs the collections—its AI interprets your preferences to choose and name the groups, while a deterministic step does the actual grouping into the number of collections you requested
Every used category is placed. The Organizer guarantees full coverage: nothing is left out. Categories that don’t fit a themed group land in a catch-all “Other” collection, which you can rename, merge, or drop when you review.
You’re charged only on success. The 50 credits are billed at the moment a proposal is produced—not when you click generate, and not when you apply. If a run fails before it produces a proposal, you see “You were not charged” and no credits are spent.
You can safely leave the page and come back—an in-progress run resumes when you return.
Step 3: Review and Edit the Proposal
When scanning finishes, Categorify shows its proposed collections for you to review. Editing here is free—no credits are charged, and nothing is created in your store until you apply.
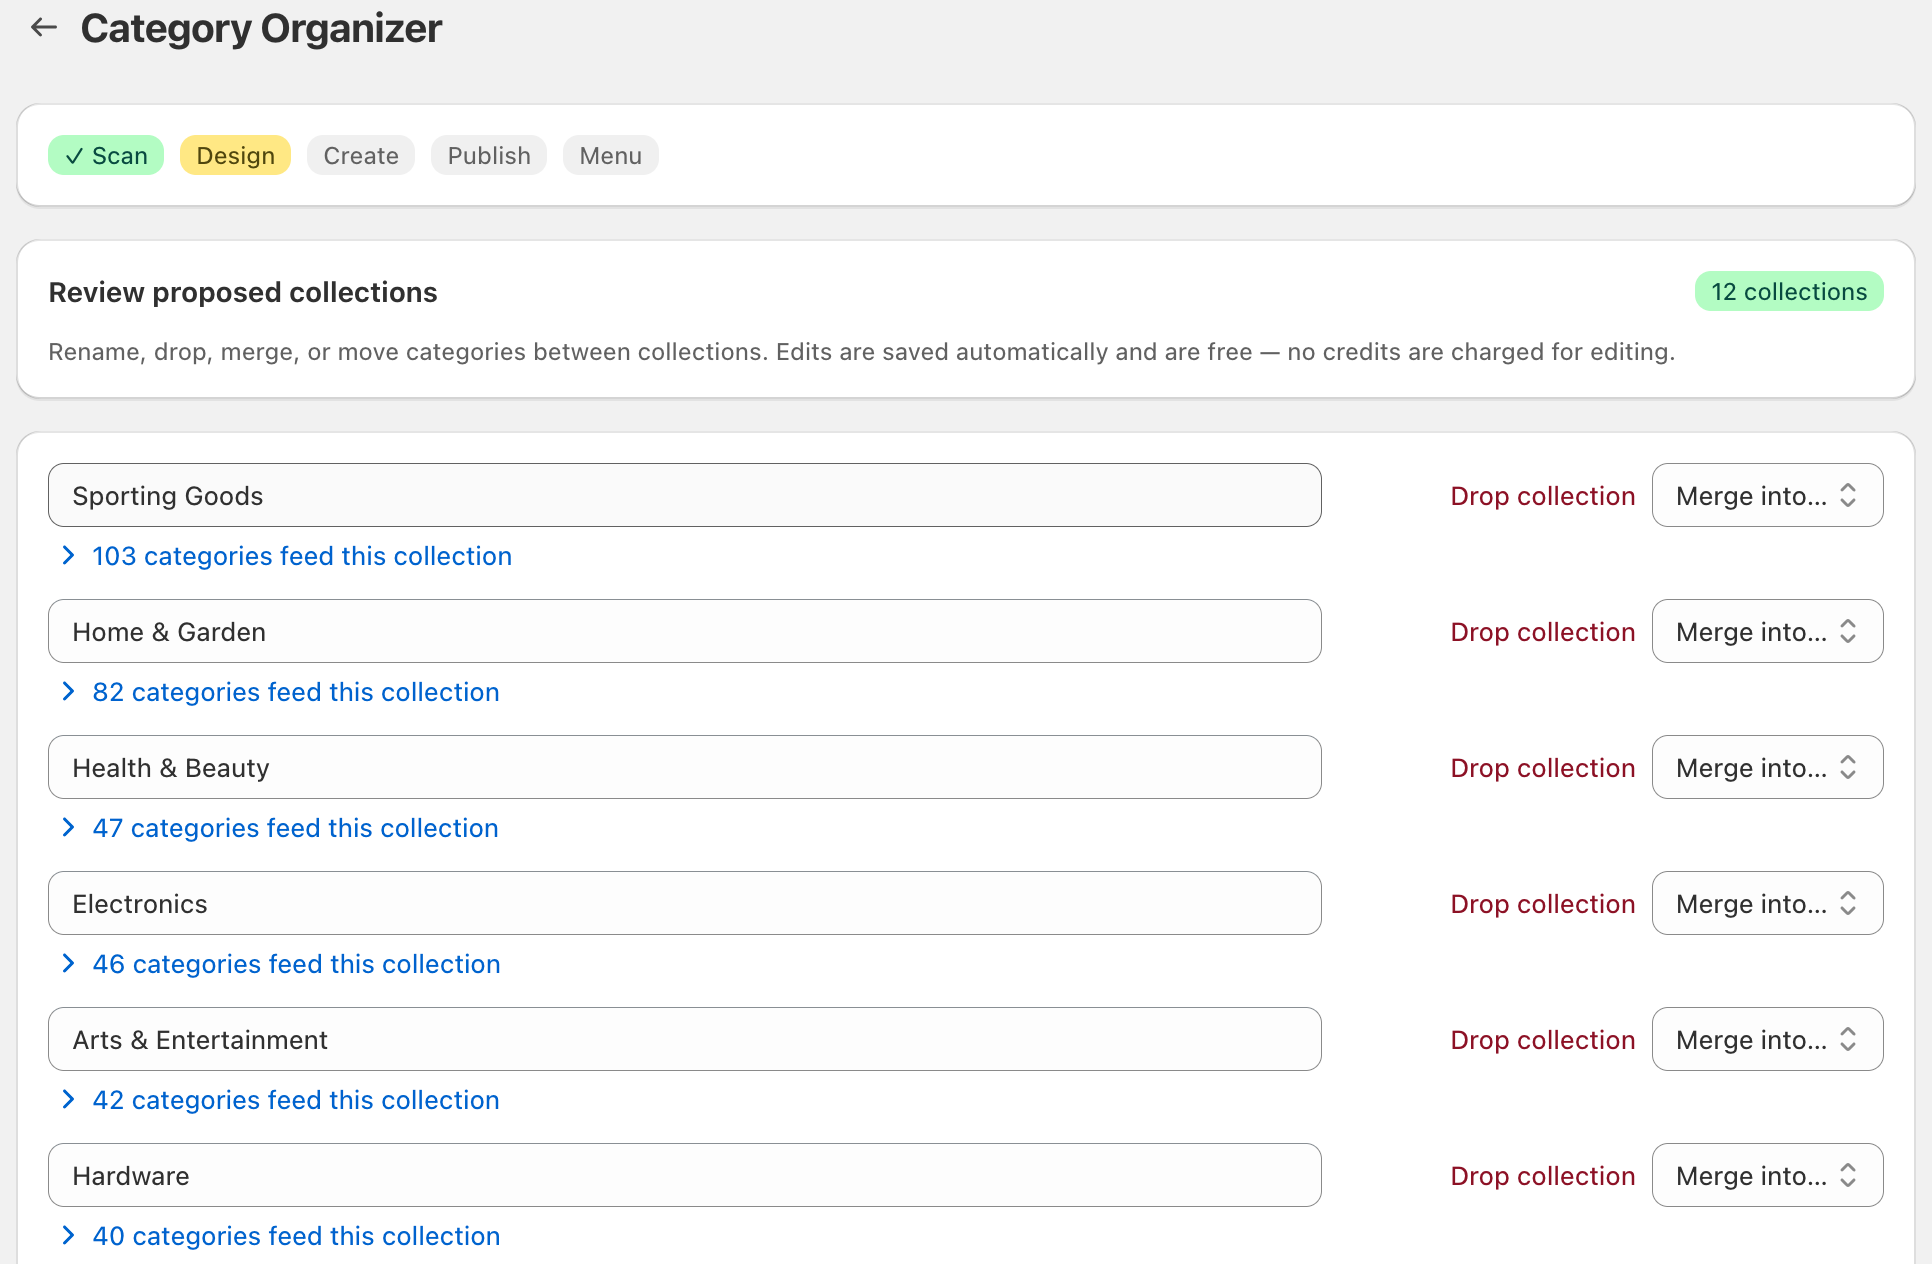
Each proposed collection shows an editable name, and an expandable list of the categories that feed it (click “N categories feed this collection” to see the category paths). You can reshape the proposal freely:
Rename a collection - Edit the name field. Changes save automatically when you click away.
Drop a collection - Click Drop collection to remove it. Its categories won’t be included anywhere unless you add them elsewhere.
Merge collections - Use the Merge into… dropdown on a collection to fold it into another. Its categories move into the target and the source collection is removed.
Move a category - Expand a collection’s category list and click Move to… next to any category to reassign it to a different collection.
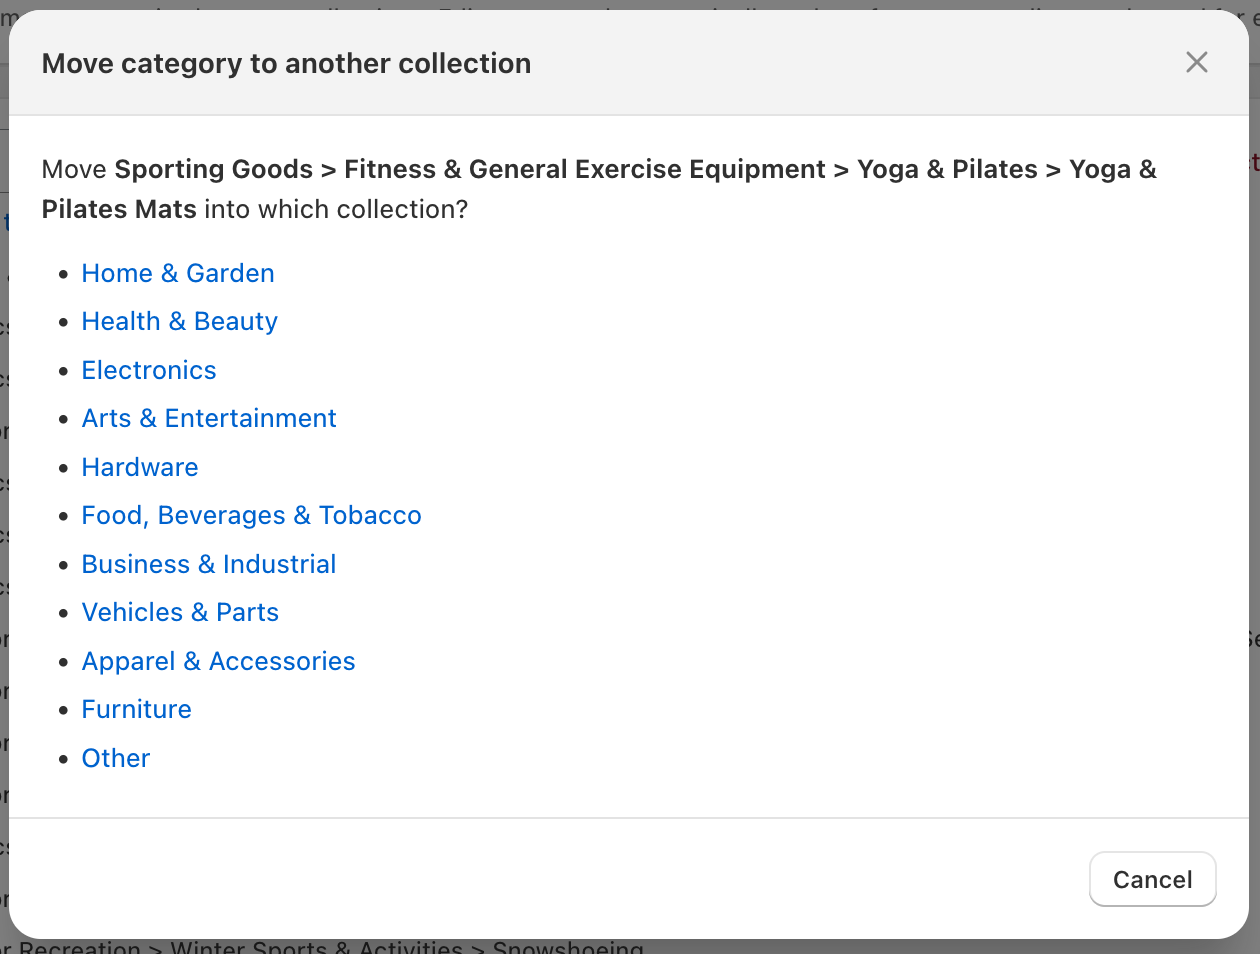
Before you can create the collections, every collection needs a name and at least one category, and no two collections can share the same name. If something’s missing, Categorify shows a note explaining what to fix.
Step 4: Create the Collections
When you’re happy with the proposal, click Create collections. Categorify materializes each group as a smart collection in your store.
Whether those collections are also published to your Online Store sales channel depends on a setting—Automatically publish new collections to the Online Store, found in Settings under Menu building & publishing. It’s on by default, so each collection the Organizer creates is published automatically. If you turn it off, the collections are still created but stay unpublished until you publish them yourself.
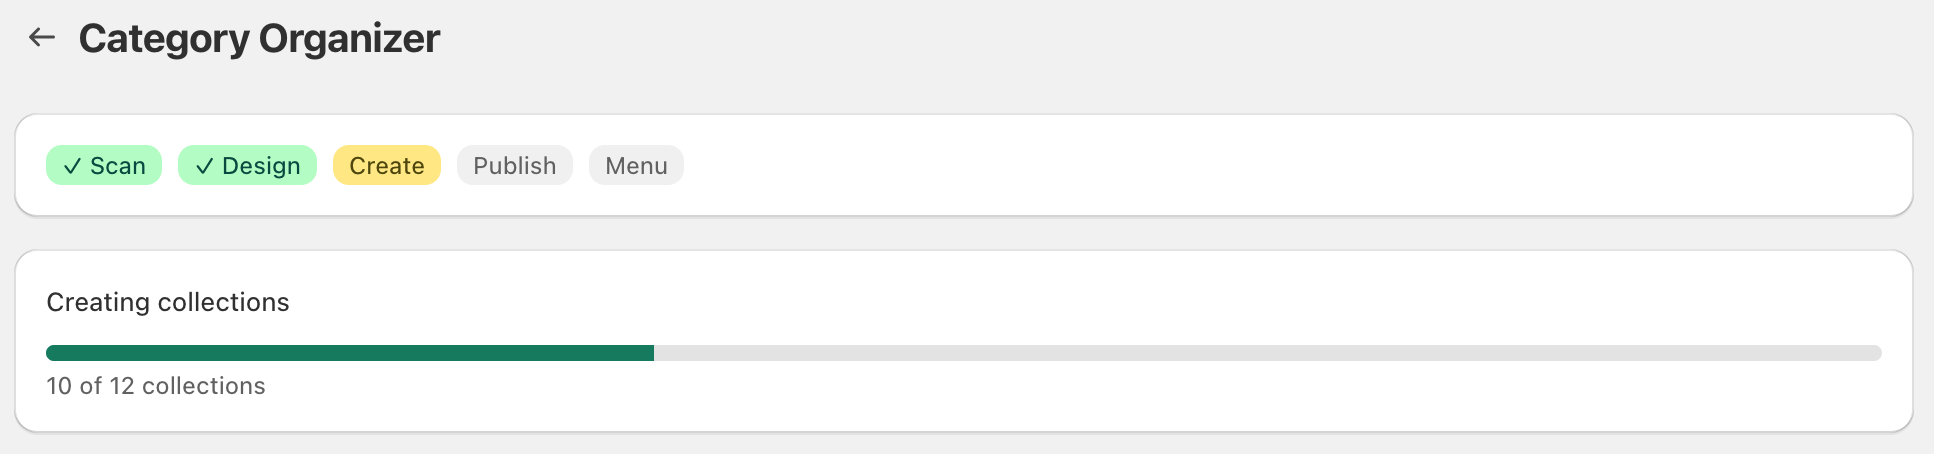
When it finishes, you’ll see one of two outcomes:
Applied - All collections were created. A confirmation appears and the run moves on to the optional menu step.
Partially Applied - Most collections were created, but some were skipped (Categorify lists which ones and why). If the run stopped partway through, click Try creating the rest to finish creating the remaining collections.
Because these are smart collections, they’ll keep updating automatically: any product you categorize from now on that matches a collection’s rule is added to it without any extra work.
Step 5: Build a Navigation Menu (Optional)
Once your collections exist, Categorify can turn them into a storefront navigation menu—a flat menu with one link per collection.
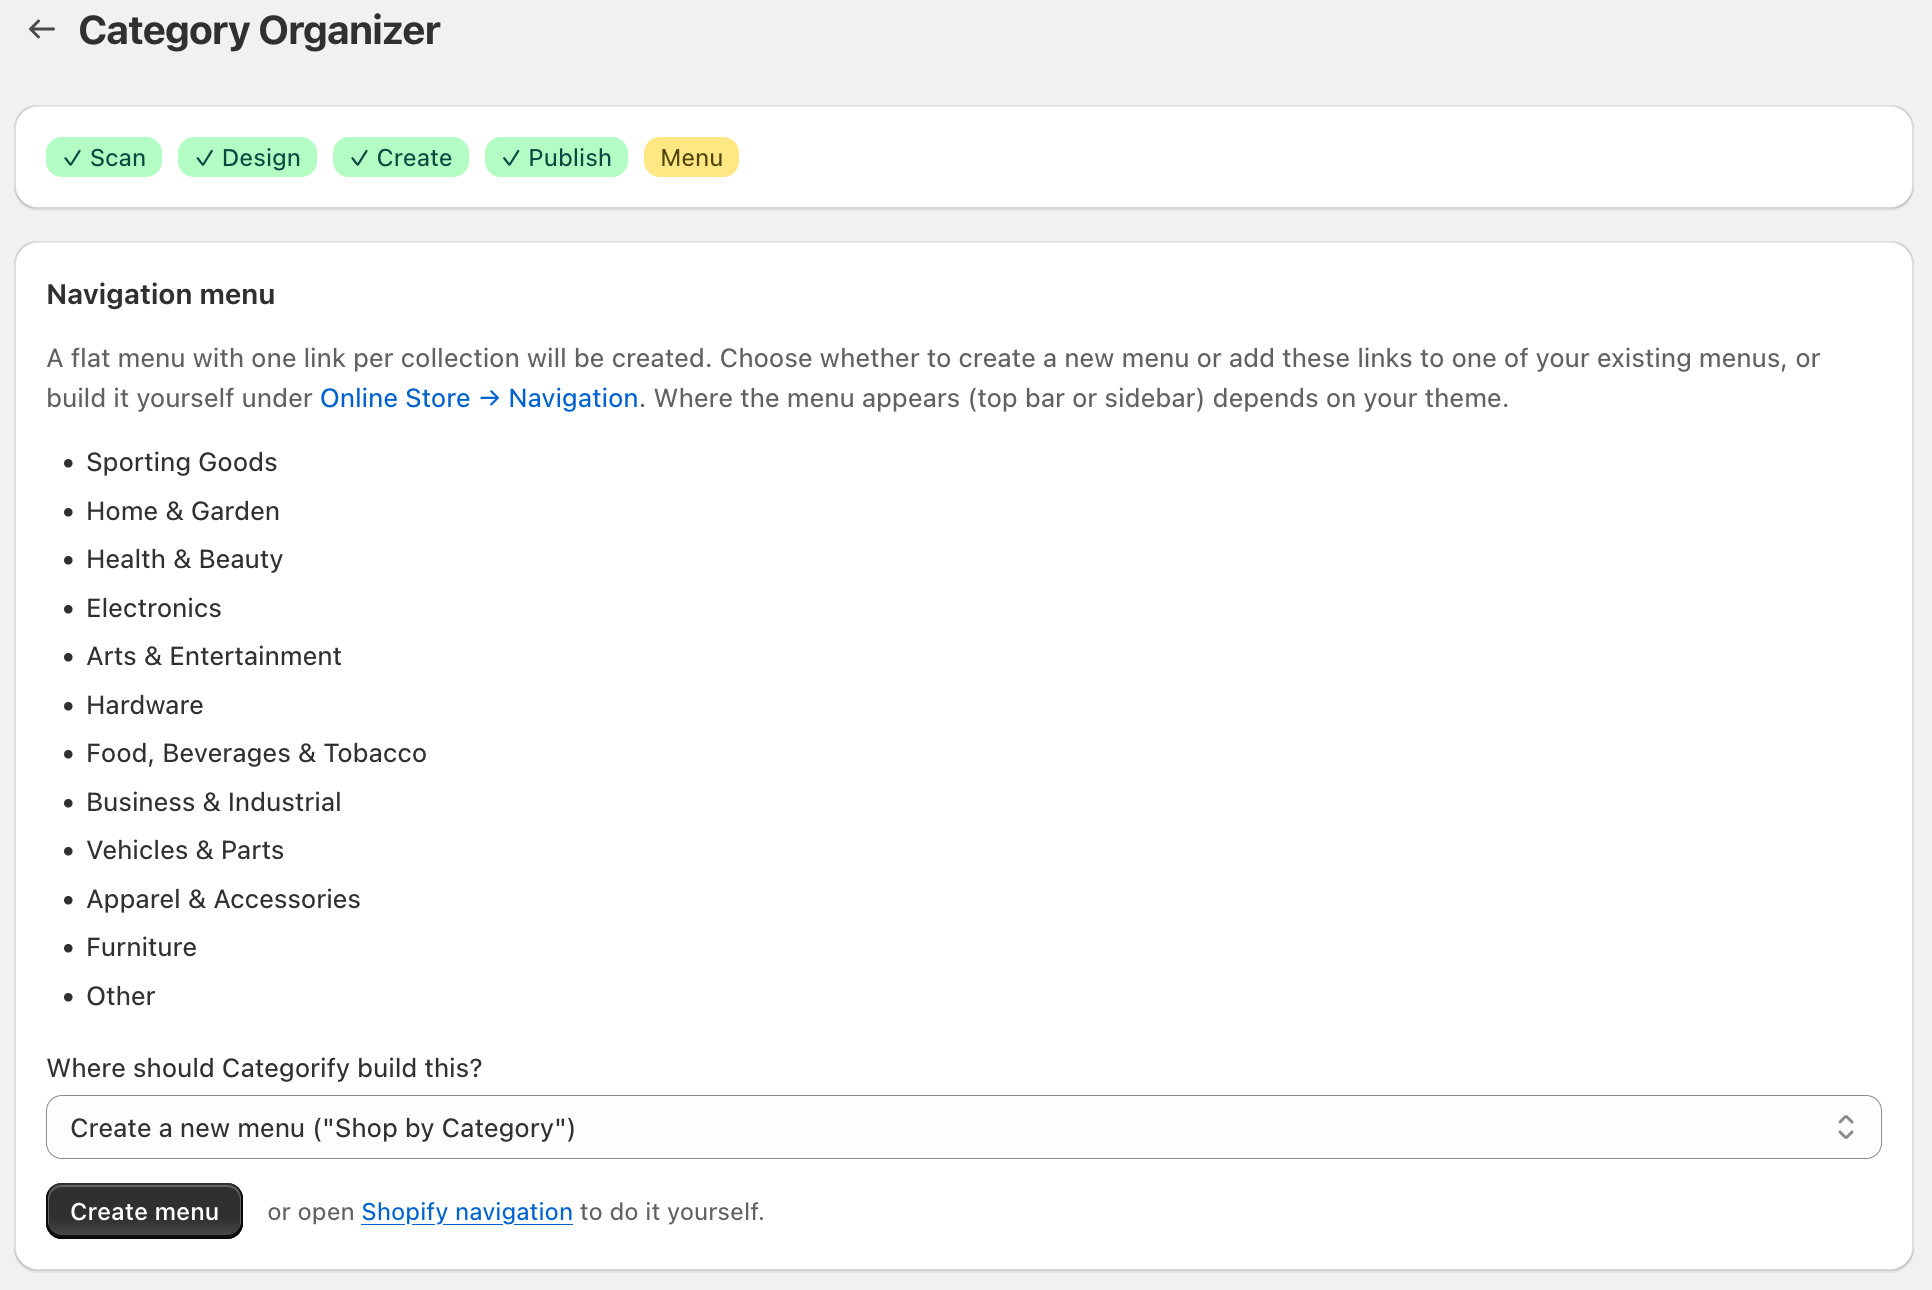
Under Where should Categorify build this?, choose how the menu lands:
Create a new menu - Builds a fresh “Shop by Category” menu from your collections.
Add to an existing menu - Appends the new collection links to a menu you already have, keeping its existing items.
Replace an existing menu’s items - Overwrites a menu’s current items with the new collection links. This can’t be undone automatically, so Categorify warns you before you proceed.
Then click Create menu (or Add to menu / Replace menu items, depending on your choice).
A one-time permission may be needed. Building or changing a menu—and publishing collections to your Online Store—requires extra Shopify permissions. If Categorify doesn’t have them yet, you’ll see a prompt to grant access in Settings, under the Menu building & publishing section (the Grant menu-building & publishing access button). Grant it once, then return and build the menu.
Finishing the storefront. After the menu is saved, review it under Online Store → Navigation in Shopify admin, then point your theme’s header at it (Online Store → Themes → Customize) so it appears on your storefront. Whether the menu shows as a top bar or a sidebar depends on your theme.
When everything’s done, click Organize again to start a new run whenever you like.
Regenerating, Discarding, and Starting Over
While reviewing a proposal, you have two other options besides applying it:
Regenerate (50 credits) - Not happy with the shape of the proposal? Adjust your preferences, target, or scope and regenerate. This discards the current proposal, produces a new one, and costs another 50 credits. Your edits so far are lost, and changing the products to organize re-scans your catalog.
Discard - Abandon the proposal without creating anything. Nothing is added to your store, and you can start a new run with different settings. Note that the 50 credits already spent to generate the proposal are not refunded.
One run at a time. A store can have only one Organize Run in progress. If a run is still scanning, awaiting your review, or applying, finish or discard it before starting a new one. If you reload the page mid-run, Categorify picks up where you left off.
How Re-Runs Work
You can run the Organizer as often as you like as your catalog evolves. Because Categorify owns and stamps the collections it creates, a later run updates those same collections instead of creating duplicates. Combined with self-maintaining smart collections, this means your category structure stays accurate over time with minimal upkeep:
- New products you categorize flow into existing collections automatically.
- Re-running the Organizer reconciles collections when you want to reshape the groups.
Credits and Limits
Cost: A flat 50 credits per proposal, charged once when the proposal is produced (charge-on-success). Reviewing, editing, applying, and building the menu are free. Regenerating produces a new proposal and costs another 50 credits.
No charge on failure: A run that fails before producing a proposal costs nothing.
No refund on discard: Discarding a proposal you already generated doesn’t refund its 50 credits.
Plan requirements: The Organizer requires an active plan. It’s unavailable on a canceled plan or an expired trial, and you need at least 50 available credits to generate a proposal.
Size limits (well above any normal catalog): up to 250 collections per proposal, up to 1,000 categories per collection, and collection names up to 255 characters.
For everything about credits—monthly allocations, top-ups, and consumption order—see Understanding Credits.
Next Steps
- Categorizing Products - Make sure your catalog is categorized before you organize
- Shopify Product Taxonomy - Understand the categories and verticals the Organizer groups
- Understanding Credits - How the 50-credit Organizer cost fits with your monthly credits and top-ups
- Configuring Settings - Grant menu-building & publishing access and control auto-publishing
- Dashboard Overview - Monitor categorization activity and credit usage
- How Categorization Works - See how products get the categories the Organizer relies on
Ready to shape your storefront? Categorize your catalog, open the Organizer, and let Categorify propose a set of self-maintaining collections you can review before anything goes live.