Quick Start Guide
This guide gets you categorizing products in under 5 minutes. You’ll categorize a couple of products manually, then enable automatic categorization so future products are handled in the background.
Prerequisites
Make sure you’ve completed Installation & Setup and have trial credits available.
Step 1: Categorize Your First Products
Let’s categorize two products using bulk categorization—the fastest way to see results.
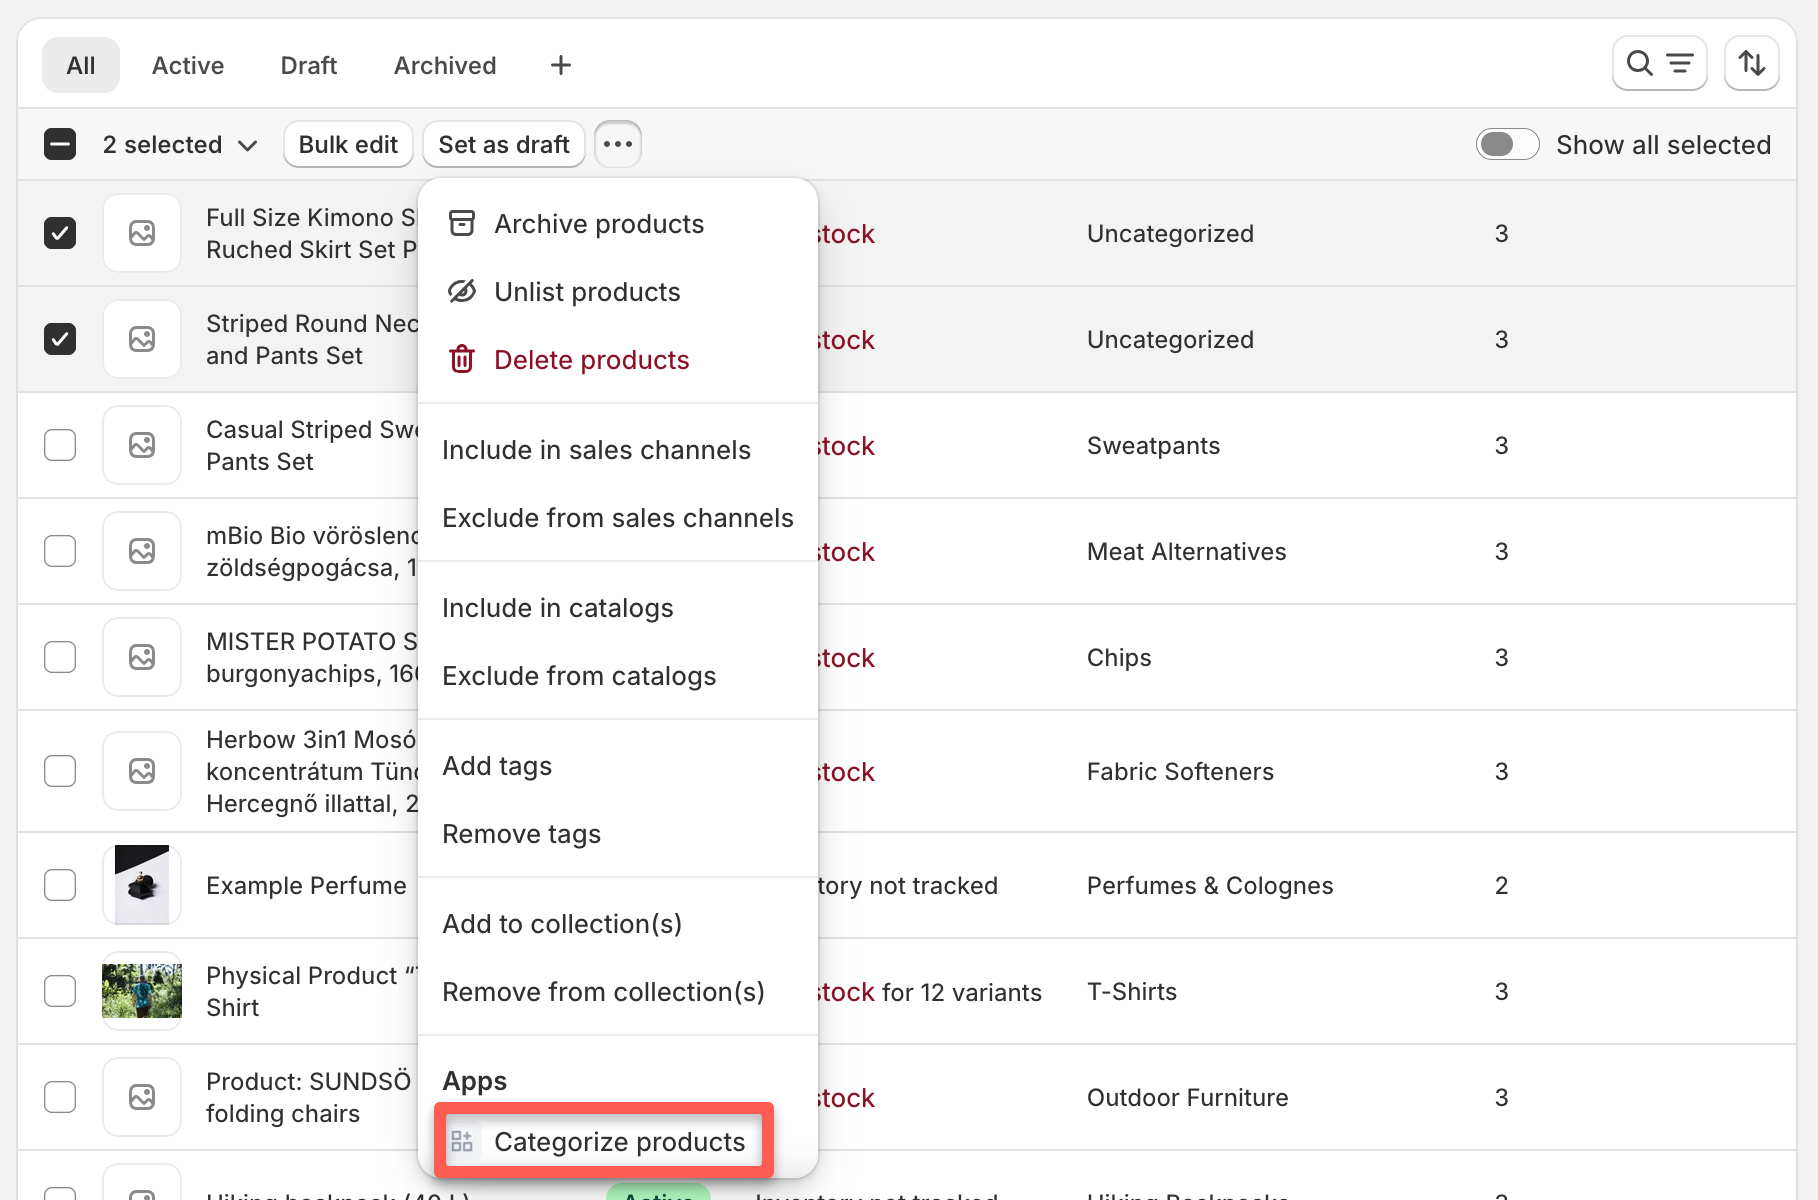
- Open Products in your Shopify admin
- Check the boxes next to 2 products that don’t have categories assigned
- Click the ••• (more actions) button at the top of the products list
- Select Categorize products
- Confirm the action when prompted
Categorify queues the requests and processes them in the background. This usually takes just a few seconds.
Step 2: View Your Results
Check the results in two places:
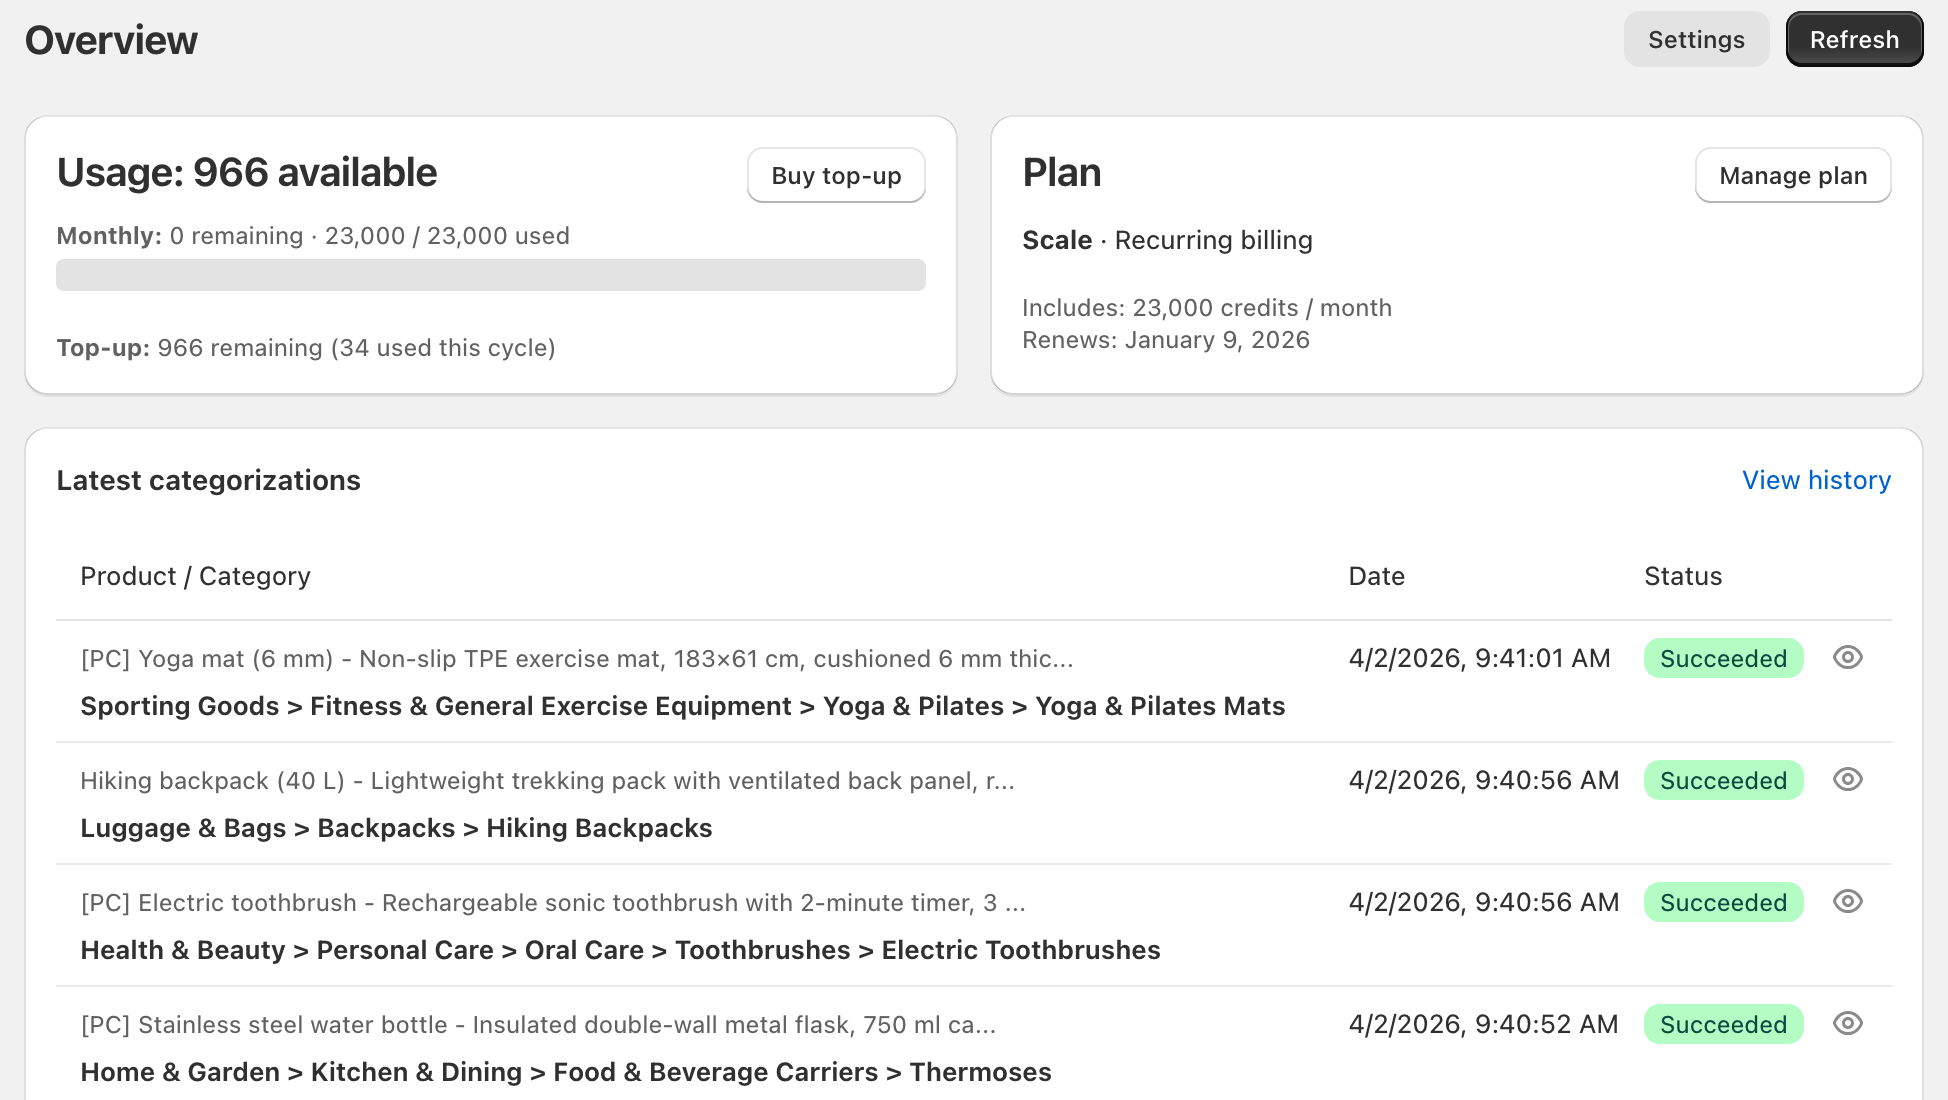
On the Dashboard
- Open Apps → Categorify
- Look at the Latest categorizations section
- You’ll see your 2 products listed with status indicators
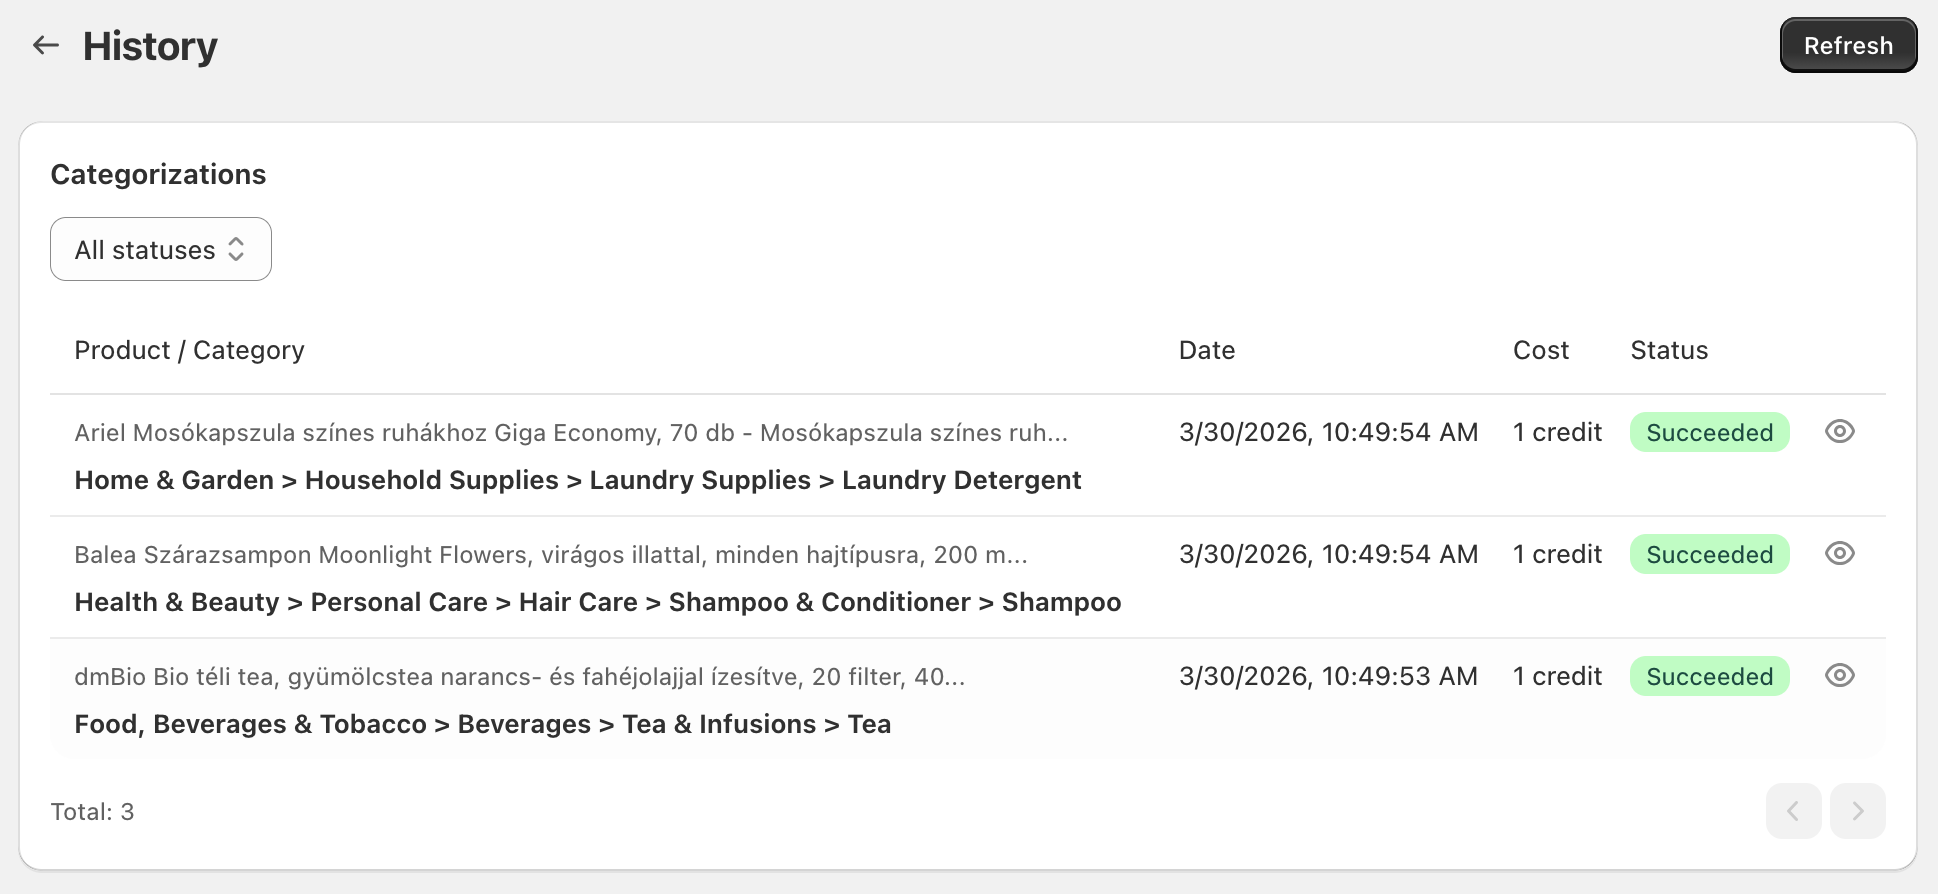
In History
Click History in the top navigation to see all past categorizations with filtering options.
Understanding Status Indicators
Each categorization shows a colored status:
- 🟢 Green - AI confidently selected this category (best result)
- 🟡 Yellow - Top-ranked category used when AI couldn’t decide (may need review)
- ⚫ Gray - No category found (needs better product description)
Green indicators mean the AI made a confident decision. Yellow results may still be correct but deserve a quick verification. For full details on status indicators and what they mean, see Categorization Status Indicators.
The Categorization Tag
Return to your products in Shopify admin. Notice that each categorized product now has:
- A category assigned in the Category column
- A tag added:
categorized-by-ai
This tag is crucial—it prevents infinite loops by marking products that Categorify has already processed. When automatic categorization is enabled, the tag ensures that the category update doesn’t trigger another categorization.
Important: Don’t remove this tag unless you want the product re-categorized.
Step 3: Enable Automatic Categorization
Now that you’ve seen how categorization works, let’s enable automatic processing for all future products.
- In Categorify, click Settings in the top navigation
- In the Automation section, check ☑ Categorize new and modified products automatically
- Click Save

That’s it! From now on, when you create or update products (through admin or API), Categorify automatically categorizes them in the background.
Important: CSV imports are not categorized automatically. Use bulk categorization instead to process imported products.
Step 4: Test Automatic Categorization
Let’s verify automatic categorization is working:
- Go to Products in Shopify admin
- Either:
- Create a new product with a title and description, or
- Edit an existing product by updating its description
- Click Save
Within a few seconds, check the Latest categorizations section on the Categorify dashboard. Your new or modified product should appear with a status indicator and category assigned.
The product also receives the categorized-by-ai tag automatically.
What You’ve Accomplished
You’ve now:
✅ Categorized products manually using bulk selection
✅ Viewed categorization results on the dashboard and in History
✅ Understood status indicators and the categorization tag
✅ Enabled automatic background categorization
✅ Verified automatic processing works
Next Steps
Now that Categorify is categorizing products automatically, explore these topics to optimize your results:
- Dashboard Overview - Understand what each dashboard section shows
- Categorizing Products - Learn all four categorization methods in detail
- Categorization Status Indicators - Deep dive into what each status means
- Configuring Settings - Customize AI instructions and categorization behavior
- Categorization Strategies - Choose the best approach for your catalog
Most stores are ready to go at this point! The app will handle categorization automatically. If you want to fine-tune how categories are selected, see Writing AI Instructions to guide the AI’s decision-making.