Configuring Settings
The Settings page gives you complete control over how Categorify operates. From enabling automatic categorization to fine-tuning the AI’s decision-making process, these settings let you customize the app’s behavior to match your business needs.
Accessing Settings
Click the Settings button in the top-right corner of the Categorify dashboard. This opens the Settings page, which is organized into five sections:
- Automation - Control automatic categorization behavior
- Categorization - Configure how the AI classifies products
- Top-up Credits - Purchase additional credits
- Plan - Manage your subscription
- Notifications - Control email notifications

Automation Section
The Automation section controls whether Categorify automatically categorizes products in the background.

Categorize New and Modified Products Automatically
Default: Unchecked (automatic categorization disabled)
Check this box to enable automatic background categorization. Once enabled, Categorify monitors your store for product changes and automatically categorizes:
- New products created through Shopify admin
- New products created via API or third-party apps
- Products modified through Shopify admin
- Products modified via API or third-party apps
Important: Products imported via CSV don’t trigger automatic categorization due to Shopify limitations. After CSV imports, use manual categorization methods to process imported products.
When you enable this setting, click Save to activate automatic categorization. From that point forward, new and modified products will be categorized in the background without any manual action.
When to enable:
- After testing manual categorization and confirming settings work as expected
- When you’re comfortable with the categorization quality
- If you regularly add or update products and want hands-free operation
When to keep disabled:
- During initial setup and testing
- If you prefer to review every categorization manually
- When you want explicit control over which products get categorized
For complete details on how automatic categorization works, see Categorizing Products.
Categorized Tag Name
Default: categorized-by-ai
This tag is added to every product that Categorify categorizes. The tag serves two critical purposes:
- Prevents infinite loops - When Categorify assigns a category, Shopify registers this as a product update. Without the tag, this update would trigger another categorization, creating an endless loop. The tag tells Categorify to skip products it has already processed.
- Tracks processed products - You can see which products have been categorized by filtering for this tag in Shopify admin.
Warning about changing the tag name:
If you change the tag name here, all products with the old tag will be treated as uncategorized. If you have automatic categorization enabled, any updates to those products will trigger re-categorization, consuming additional credits.
When to change the tag:
- Rarely—only if you have a specific business need for a different tag name
- Never change it casually or frequently
When to keep the default:
- Almost always—the default
categorized-by-aitag is clear and descriptive
Categorization Section
The Categorization section controls how the classification pipeline operates. These settings directly affect which categories are returned and how confident the AI must be before selecting a category.
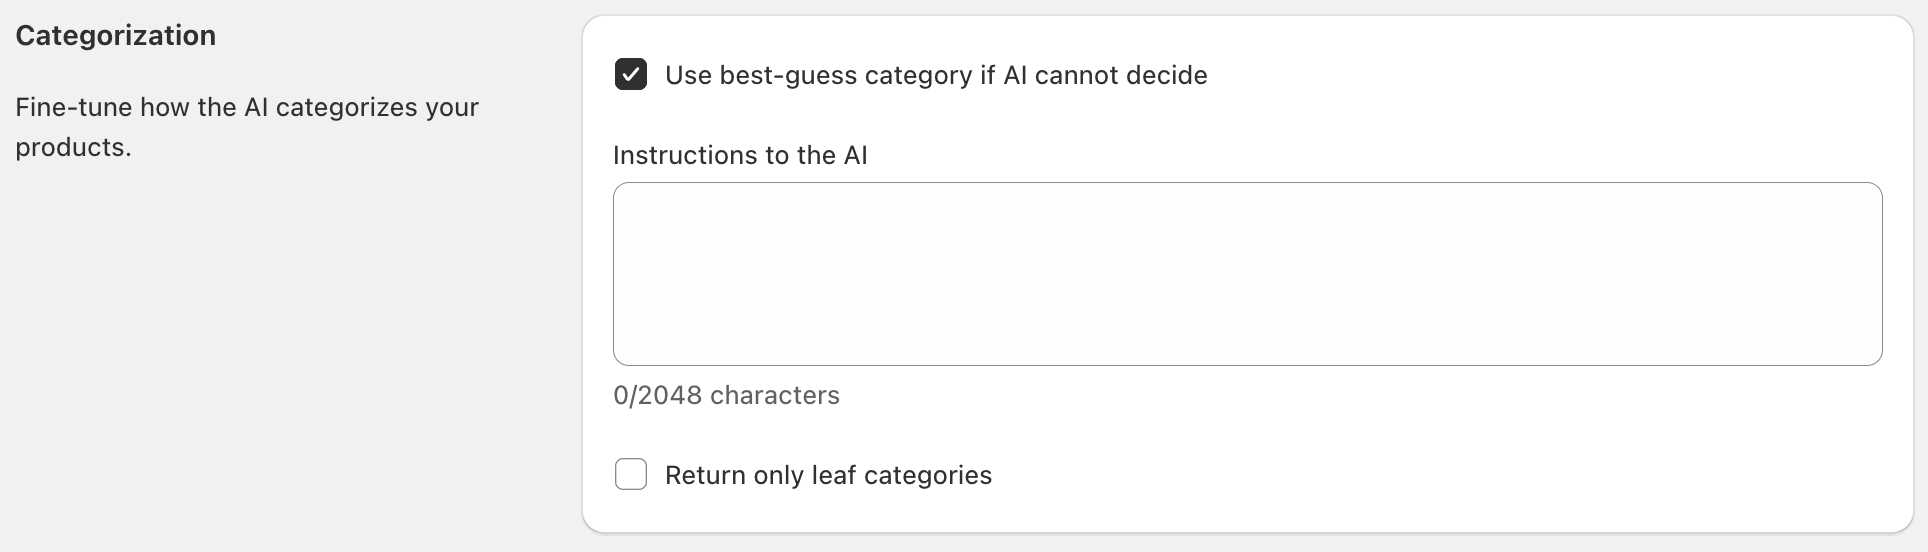
Use Best-Guess Category if AI Cannot Decide
Default: Unchecked
This setting controls Step 3 of the categorization pipeline—what happens when the AI cannot confidently select a category.
When checked (enabled):
If the AI proceeds to the fallback phase, the system returns the candidate category with the highest relevance score. This ensures you get a result (assuming candidates exist), shown with a 🟡 yellow status indicator.
When unchecked (disabled):
If the AI cannot confidently decide, the system returns no category (⚫ gray status indicator). This prioritizes accuracy over coverage.
When to enable:
- You need categories for every product, even if confidence is lower
- You’re doing initial catalog imports and will review results manually
- Downstream systems require some category, even if imperfect
- You prefer to correct wrong categories rather than have missing ones
When to disable:
- Accuracy is more important than coverage
- You’re willing to manually categorize products that return no category
- You want only high-confidence results
- Your platform rejects incorrect categorizations
For detailed guidance on when to use this setting, see Categorization Strategies.
Instructions to the AI
Default: Empty (no custom instructions)
This field lets you provide natural language guidance that influences how the AI selects categories during Step 2 of the pipeline. Write instructions as if coaching a colleague:
Example instructions:
For phones without contract information, default to unlocked unless description explicitly states contract or pre-paid.
Prioritize material over style for clothing (e.g., leather jacket goes under leather clothing, not jackets).
Gaming peripherals go under gaming, not general computer accessories.
How it works:
During the AI selection phase, the system evaluates your custom instructions alongside the product description and candidate categories. Well-written instructions help resolve ambiguity and encode your business logic.
When to use:
- You have recurring patterns in products that need disambiguation
- Certain product types consistently return unexpected categories
- You want to apply company-specific categorization rules
- Your platform has specific categorization preferences
Best practices:
- Be specific about when the instruction applies
- Use clear, everyday language
- Focus on tiebreakers between similar categories
- Test instructions with real products to validate they work
For comprehensive guidance on writing effective instructions, see Writing AI Instructions.
Return Only Leaf Categories
Default: Unchecked
This setting controls Step 1 of the categorization pipeline—which categories are included in the candidate set.
When checked (enabled):
Only leaf categories (categories with no children) are generated as candidates. Parent categories are filtered out completely. The AI must choose between specific, detailed categories or return no result.
When unchecked (disabled):
Both leaf and parent categories can appear in candidates. When the AI encounters ambiguity between sibling leaf categories, it may select their parent category as a safe fallback.
Example:
For “Apple iPhone 16 Pro” without contract information:
- Unchecked: AI can choose the parent category “Mobile Phones” when uncertain about whether it’s unlocked, contract, or pre-paid
- Checked: AI must choose between “Unlocked Mobile Phones,” “Contract Mobile Phones,” or “Pre-paid Mobile Phones”—or return no category
When to enable:
- Your platform requires leaf-level classifications (rejects parent categories)
- Business rules mandate maximum specificity
- You’re feeding product data to systems with strict taxonomy requirements
When to disable:
- You prefer semantically correct categories over forced specificity
- You want the AI to fall back to safe parent categories when uncertain
- Your platform accepts both leaf and parent categories
Trade-offs:
Enabling leaf-only mode eliminates the AI’s ability to use parent categories as safe fallbacks. You may need robust custom instructions and detailed product descriptions to handle ambiguous cases.
Understanding the Categorization Pipeline
The three categorization settings work together to control a three-step process:
Step 1: Generate Candidates
The system analyzes the product description and identifies 15 potential categories with relevance scores. If “Return only leaf categories” is enabled, only leaf categories are included.
Step 2: AI Selection
The AI evaluates the candidates, considering the product description, taxonomy structure, and your custom instructions. If confident, it selects a category (🟢 green indicator).
Step 3: Fallback Behavior
If the AI cannot confidently decide:
- “Use best-guess” enabled: Returns highest-scored candidate (🟡 yellow)
- “Use best-guess” disabled: Returns no category (⚫ gray)
For complete details on how these settings interact and which combinations work best for different scenarios, see Categorization Strategies.
Top-up Credits Section
The Top-up Credits section shows your current top-up credit balance and lets you purchase additional credits.

Available Top-up Credits
Displays how many top-up credits you currently have. Top-up credits:
- Persist across billing cycles (don’t expire)
- Are consumed after monthly credits are exhausted
- Can be purchased in various package sizes
Purchasing Top-up Credits
Use the dropdown to select a top-up credit package, then clickBuy credits. Multiple package sizes are available with volume discounts—larger packages offer better per-credit pricing.
Credits are added to your balance immediately after purchase and never expire. They’ll be consumed automatically after your monthly credits are exhausted.
For complete details on available packages, pricing, and volume discounts, see Understanding Credits.
When to purchase top-up credits:
- Before large imports: Buy enough to cover the import plus a buffer
- Regular monthly overages: Consider upgrading your plan instead of repeatedly buying top-ups
- Unexpected usage spikes: Smaller packages work well for unpredictable needs
- Peace of mind: Purchase credits before you need them as a buffer
Plan Section
The Plan section shows your current subscription status and monthly credit usage.

Current Plan
Displays:
- Plan name (Trial, Starter, Growth, Scale, or Pro)
- Monthly credit allocation
- Next renewal date
Monthly Credit Balance
Shows:
- Credits used this billing cycle
- Total monthly credits in your plan
- Visual progress bar
Manage Plan and Billing
Click Manage plan and billing to open the customer portal where you can:
- If on trial: Subscribe to a paid plan
- If cancelled: Reactivate your subscription
- If active: Upgrade, downgrade, or cancel your plan
- Update payment methods
- View invoices
- Modify billing information
For details on available plans and features, see Subscription Plans & Billing.
Notification Section
The Notification section controls email notifications from Categorify.

Notification Email Address
Default: Your account email address
Enter the email address where you want to receive notifications about:
- Credit balance warnings
- Trial expiration reminders
- Subscription changes
- Important service updates
Receive Latest Product Updates
Default: Unchecked
Check this box to subscribe to product update emails, where you’ll be notified about:
- New features and functionality
- Product improvements
- Tips and best practices
- Release announcements
You can unsubscribe from these emails at any time using the link in any product update email.
Saving Your Settings
After making changes to any section, click the Save button at the bottom of the Settings page. Changes take effect immediately.
Important: Some settings—particularly enabling automatic categorization—have immediate and ongoing effects. Make sure you understand how settings work before enabling them.
Common Configuration Scenarios
Initial Setup (Conservative Approach)
For your first setup, start with conservative settings:
- Automatic categorization: Unchecked
- Use best-guess: Unchecked
- Custom instructions: Empty
- Leaf only: Unchecked
Test manual categorization on sample products, then enable automation once satisfied with results.
Maximum Coverage Configuration
To categorize every product, even with lower confidence:
- Automatic categorization: Checked
- Use best-guess: Checked
- Custom instructions: Optional
- Leaf only: Unchecked
Precision-First Configuration
To only return highly confident results:
- Automatic categorization: Checked (after testing)
- Use best-guess: Unchecked
- Custom instructions: Recommended for edge cases
- Leaf only: Unchecked
Platform Requirements (Leaf Categories Only)
When your platform requires specific leaf-level categories:
- Automatic categorization: Checked (after testing)
- Use best-guess: Checked
- Custom instructions: Recommended
- Leaf only: Checked
For complete guidance on choosing the right configuration, see Categorization Strategies.
Next Steps
Now that you understand the Settings page:
- Categorizing Products - Learn all four categorization methods
- Categorization Strategies - Choose the right configuration for your needs
- Writing AI Instructions - Create effective custom instructions for edge cases
- Understanding Credits - Learn about credit consumption and top-up packages